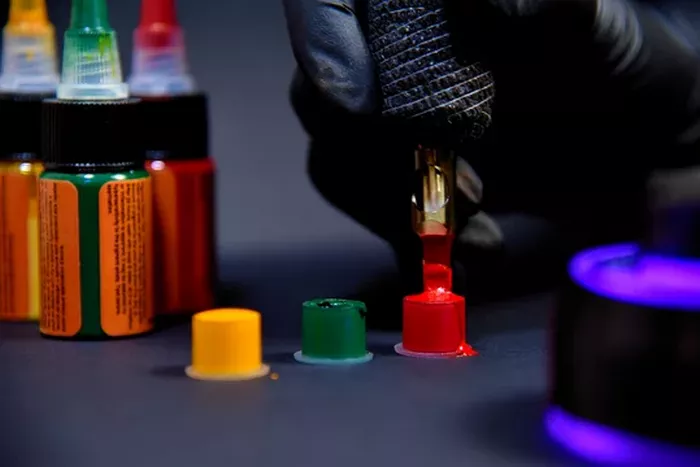
When it comes to getting a tattoo, one of the most crucial decisions you’ll make is determining its size. Tattoo size isn’t just a matter of personal preference; it significantly impacts the overall outcome of your tattoo. From the design detail and placement to the cost and time required for the tattooing process, size plays a pivotal role. In this guide, we will delve into the importance of tattoo size, factors influencing it, how to measure it accurately, provide examples, and discuss the consultation process with your tattoo artist.
Importance of Tattoo Size
Understanding why tattoo size matters is fundamental to making an informed decision. The size of your tattoo affects several key aspects:
Design Detail: Larger tattoos provide more space for intricate details, allowing for complex designs to be executed with clarity. A tattoo that’s too small may cause fine lines or detailed elements to merge or blur, potentially diminishing the design’s impact.
Placement: The size of a tattoo will influence where it can be placed on the body. Some areas are better suited for larger designs, while others can accommodate smaller tattoos more effectively. Additionally, the curvature and movement of different body parts can affect how the tattoo looks once applied.
Cost: Generally, larger tattoos are more expensive due to the increased amount of time and effort required. The cost can also be influenced by the complexity of the design, as more detailed tattoos will demand a higher price.
Session Time: The time required to complete a tattoo is directly related to its size. Larger tattoos typically require multiple sessions, which can be more physically demanding and may involve longer periods of discomfort.
Factors Influencing Tattoo Size
Several factors determine the appropriate size for a tattoo:
Design Complexity
Intricate designs with fine details, shading, or multiple elements often need to be larger to ensure every aspect is captured accurately. For instance, a detailed portrait or a landscape tattoo might need a considerable amount of space to showcase its intricacies properly. Smaller tattoos with minimal detail, such as simple symbols or text, can be effectively done in a compact size.
Body Placement
Different body parts accommodate various tattoo sizes differently:
Flat Areas: Regions like the forearm or thigh are ideal for larger tattoos because they provide a stable and expansive surface.
Curved Areas: Areas like the ribcage or back can host larger designs but may require adjustments to account for the body’s natural curves and movement.
Smaller Areas: Places like the wrist, ankle, or behind the ear are better suited for smaller tattoos due to their limited space.
The body’s movement and curvature can affect how a tattoo appears once healed. For instance, tattoos on the elbow or knee might stretch or distort due to the skin’s flexibility and movement.
Pain Tolerance
Larger tattoos typically require longer sessions, which can lead to increased pain and discomfort. While everyone’s pain threshold varies, it’s important to consider your tolerance level and discuss pain management strategies with your tattoo artist. Smaller tattoos, on the other hand, usually involve shorter sessions and may be less painful overall.
Measuring Tattoo Size
Accurate measurement is essential to ensure that your tattoo fits the desired area and aligns with your expectations. Here’s a step-by-step guide on how to measure the area for a tattoo:
Gather Tools: You’ll need a ruler or measuring tape, and possibly a piece of string if the area is irregularly shaped.
Prepare the Skin: Make sure the skin is clean and dry. If you’re measuring for a specific placement, ensure the area is relaxed and not tensed.
SEE ALSO: What to Know Before Your First Tattoo
Measure the Area:
Flat Areas: Use a ruler to measure the length and width of the area. For precise measurements, you can use a piece of string to outline the area and then measure the string with the ruler.
Curved Areas: Use a flexible measuring tape or string to trace the curve of the area. For better accuracy, you may need to take several measurements along the curve.
Account for Movement: For areas that will experience movement, such as the arm or ribcage, measure the area in different positions (e.g., relaxed and flexed) to ensure the tattoo will fit well in all scenarios.
Double-Check: It’s always a good idea to double-check your measurements to avoid any discrepancies that could affect the final outcome of your tattoo.
Tattoo Size Examples
Here are some common tattoo sizes and their typical placements:
Small Tattoos (1-2 inches):
Placement: Wrist, ankle, behind the ear.
Example: A small symbol, initial, or word.
Approximate Cost: $50-$150.
Session Time: 30 minutes to 1 hour.
Medium Tattoos (3-5 inches):
Placement: Forearm, upper arm, shoulder.
Example: A medium-sized graphic, floral design, or detailed text.
Approximate Cost: $150-$400.
Session Time: 1 to 3 hours.
Large Tattoos (6 inches and up):
Placement: Back, chest, thigh, side.
Example: Full sleeves, large intricate designs, or detailed portraits.
Approximate Cost: $400 and up.
Session Time: Multiple sessions, each lasting several hours.
| Size Category | Placement | Typical Design | Approximate Cost | Session Time |
| Small | Wrist, ankle, behind ear | Small symbol or word | $50-$150 | 30 minutes to 1 hour |
| Medium | Forearm, upper arm | Medium graphic or text | $150-$400 | 1 to 3 hours |
| Large | Back, chest, thigh | Full sleeve, large portrait | $400 and up | Several hours |
Consultation with Tattoo Artist
Discussing tattoo size with your artist is crucial. A professional can provide valuable insights into how different sizes will work with your design and body placement. They can also offer advice on:
Design Adjustments: How to modify or simplify a design to fit your chosen size.
Placement Recommendations: The best location for the size of tattoo you desire.
Cost and Time Estimates: Providing a clearer picture of what to expect in terms of budget and time commitment.
Adjusting Design for Size
Design adjustments are often necessary to ensure the tattoo fits well within the selected size without losing its essence:
Scaling Down: For smaller tattoos, some elements might need to be simplified or omitted. This ensures that the design remains clear and recognizable even in a reduced size. Detailed patterns or text may become too cluttered if scaled down too much.
Scaling Up: Larger tattoos offer the opportunity to add more detail or elaborate on the design. You can incorporate additional elements or enhance existing ones to create a more impactful and intricate piece.
Conclusion
In conclusion, sizing a tattoo involves careful consideration of design detail, body placement, pain tolerance, and practical measurements. By understanding the implications of tattoo size and working closely with a professional tattoo artist, you can ensure that your tattoo meets your expectations and complements your body perfectly. Whether you choose a small, medium, or large design, proper planning and communication will lead to a more satisfying and successful tattoo experience.
Related Topics